HeliScript - Overview
Vket Cloud allows programming using the engine's own programing language called HeliScript.
Using HeliScript, you can implement more complex gimmicks and behaviors compared to using Actions.
You can learn about the syntax of HeliScript by reading it in order starting from Built-in types.
As an example, we will show a basic implementation of displaying "Hello World" on the console.
About IDE
The recommended IDE is Visual Studio Code. Visual Studio Code is a lightweight and high-function editor that supports HeliScript syntax.
Download Visual Studio Code from here.
Visual Studio is not recommended as an IDE. When you open and save HeliScript created with Unity Vket Cloud SDK in Visual Studio, it may become ANSI, and you may not be able to build.
Example of how to use HeliScript (displaying Hello World on the console)
1. Add a HeliScript file to Assets Folder
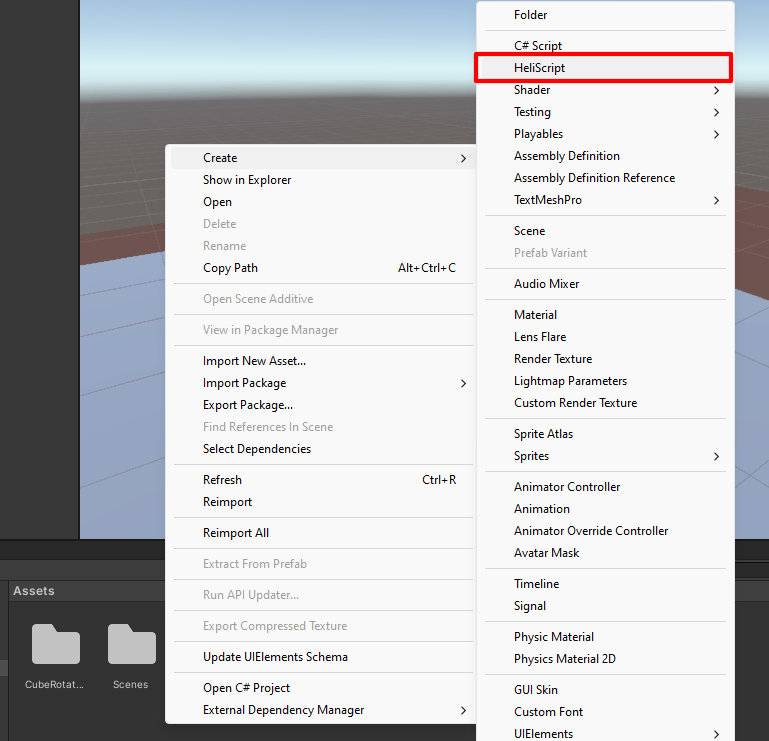
First, create a file to write HeliScript.
Right-click in the Project window (where folder such as Assets are located), select "HeliScript", and add the HeliScript file to any folder.
As an example, a Scripts folder is newly added to the Assets folder, followed by creating a new HeliScript file with the name HelloWorld.hs.

2. Add VKC Attribute Script to the scene
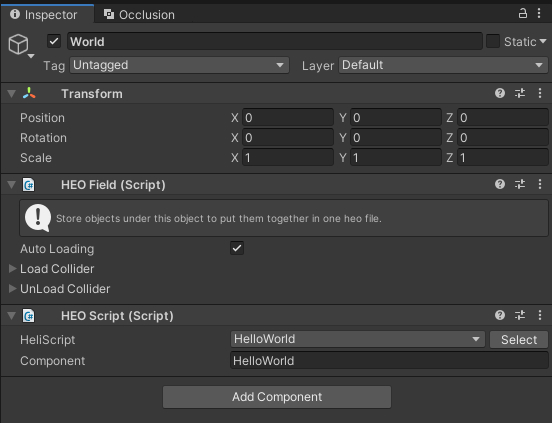
After adding the HeliScript file, the next step is to configure HeliScript in the scene.
In the VKC Attribute Script component, select the HeliScript file you want to run.
By selecting "Select" on the right side of the menu, a list of HeliScripts will appear, so select the HeliScript to be used.
3. Enable debug mode in VketCloudSettings / BasicSettings
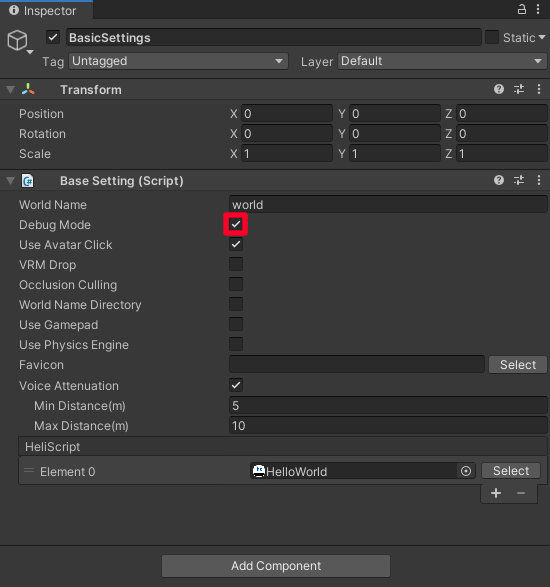
In the HelloWorld script for this example, it is necessary to enable debug mode in order to display the result on the debug log.
To use debug mode, enable Debug Mode in VketCloudSettings / BasicSettings.
4. Write HeliScript
Now it's time to write the HeliScript itself.
A code example is shown below as an implementation of HelloWorld.hs.
//component
component HelloWorld
{

     //Constructor: executed only once on player entry
     public HelloWorld()
     {
     //Output to debug log
     hsSystemWriteLine("Hello, World!");
     }

     //Update function: executed every frame
     public void Update()
     {

     }
}
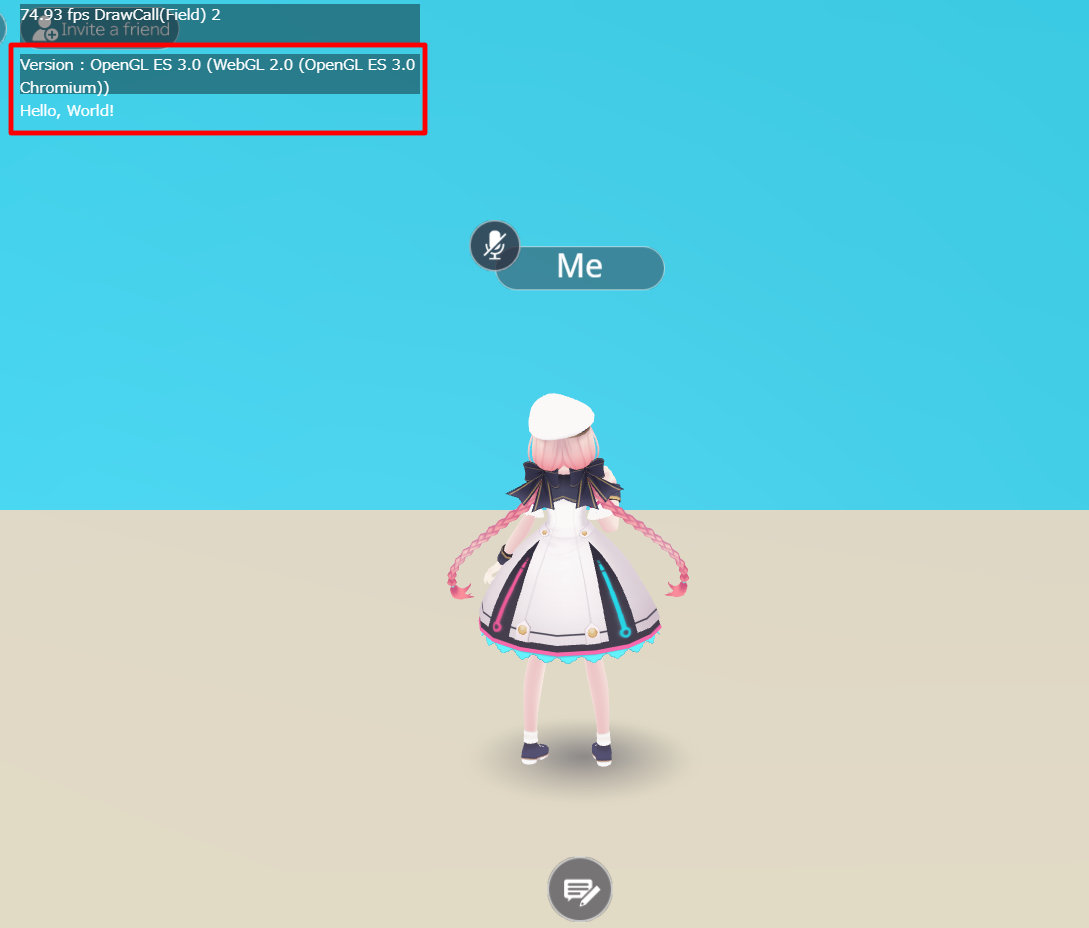
5. Test with Build And Run
After completing the code implementation and executing Build And Run, "Hello, World!" will be displayed to the debug log on the screen.
Troubleshooting Errors
If an error occurs when running a HeliScript during world loading or by trigger, the error will be displayed on the debug log and browser console.
Please enable the Debug Mode to show the debug log.
As the debug log will be hidden during world loading, please see the Browser Console for checking the reason of loading error.
Placing VKC Attribute Script and referencing objects
VKC Attribute Script components can be attached to gameobjects with VKC Item Field and its child gameobjects. For details on how to place HeliScript, please check VKC Attribute Script.

In HeliScript, each objects are referenced by using Item and Node classes mentioned later.
For example, a script that outputs a message when the exampleObject under VKC Item Field is clicked can be written as follows.
component example
{
     //Define item/player class
     //Note that objects cannot be initialized here, including using functions such as hsItemGet
    Item ex_Item;
    Player ex_player;

    bool    ex_isPlayerInit; //bool for handling player object initialization
    int ex_ItemNodeIndex;

    //Constructor
     public example()
     {
         //Refer to Items: Specify items whose name ends by .heo. This instance, enter the object having HEOField
         ex_Item = hsItemGet("World");

         ex_isPlayerInit = false;

         //Since Item type is HEOfield, the nodes of the objects under can be obtained
         ex_ItemNodeIndex = ex_Item.GetNodeIndexByName("exampleObject");
     }

    public void update()
    {
        //If Player instance has not been obtained yet, call hsPlayerGet() only once
        if(!ex_isPlayerInit){
        ex_player = hsPlayerGet();
        ex_isPlayerInit = true;
        }
    }

     //Callback triggered when the target node is clicked. Please refer to the callback function page for how to use OnClickNode.
     public void OnClickNode(int NodeIndex)
     {
         //When the click target matches the node obtained previously:
        if(NodeIndex == ex_ItemNodeIndex){
        //Display message on debug console
         hsSystemWriteLine("exObj Clicked.");
         }
     }
}
Initializing Player objects
On SDK Ver12.x and later versions, calling Player class functions within the constructor has been disabled.
In the example above, a bool variable in the Update function is used to obtain the Player instance outside the constructor.
By attaching script to VKCAttributeScript and building the world, a message will be output when you click on the exampleObject as shown below.
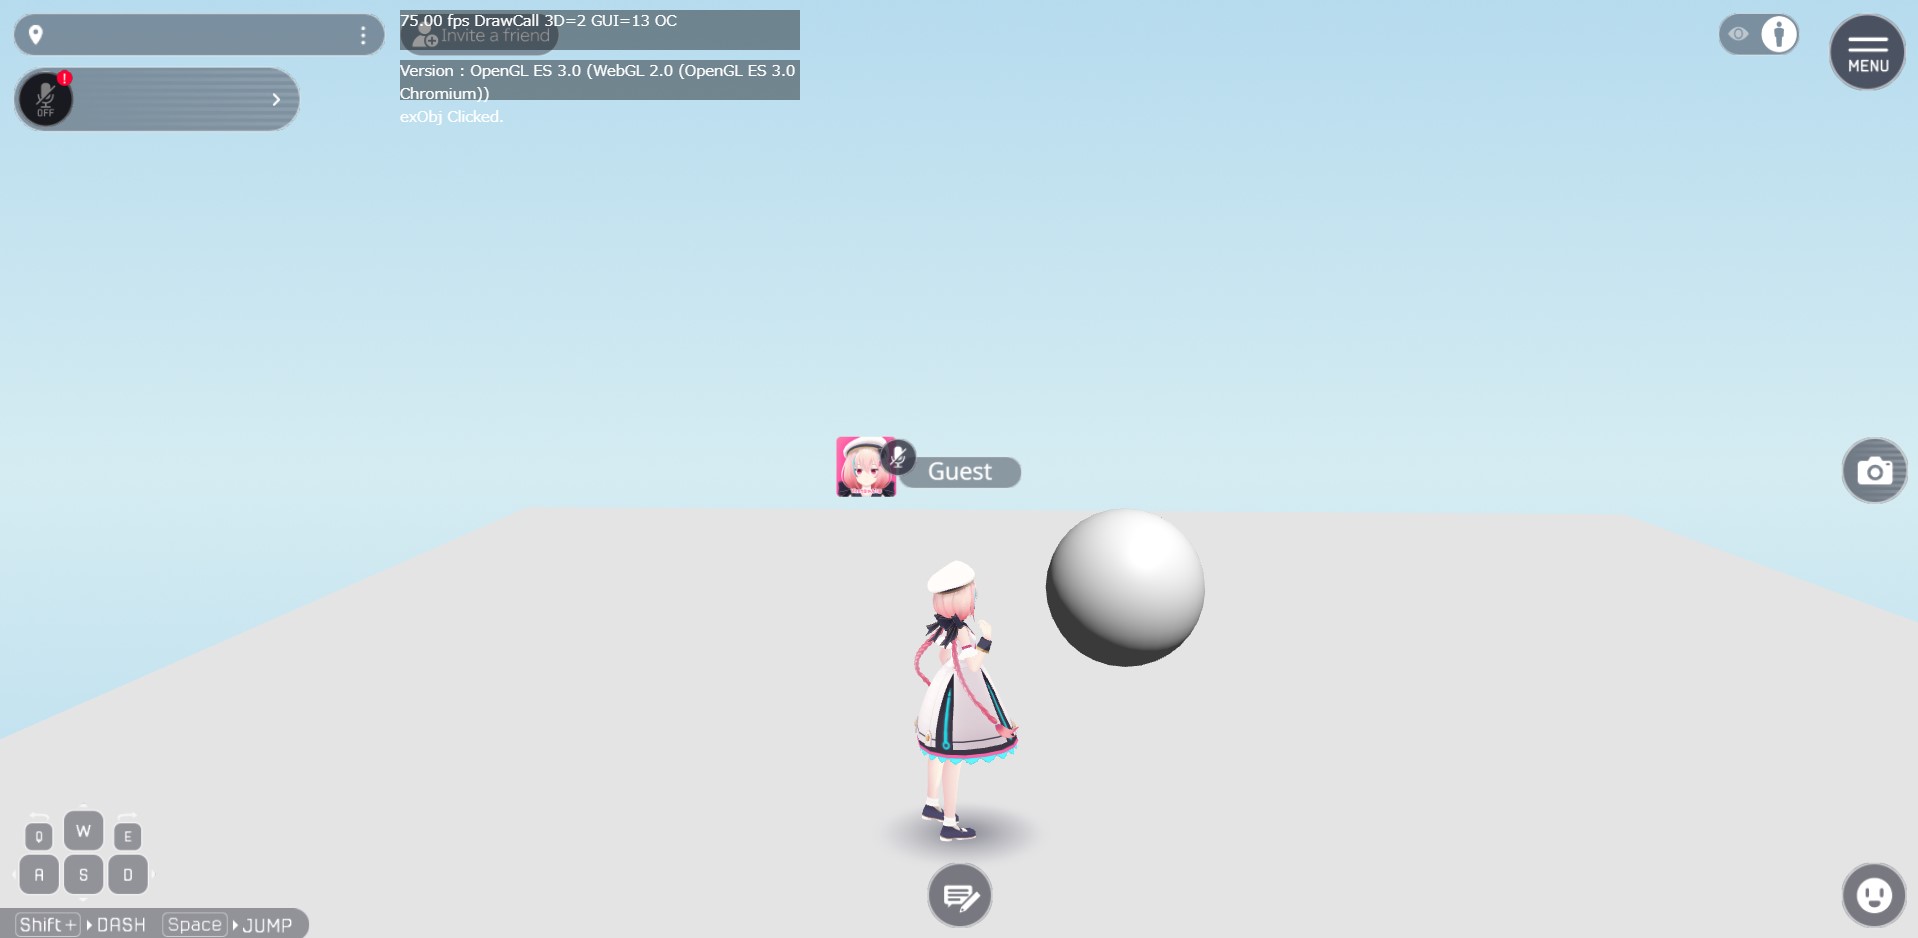
For callback functions provided in the SDK such as OnClickNode, please refer to Components / Callback functions.
About Player / Item / Node
Player, Item, and Node are concepts unique to Vket Cloud.
An brief explanation of each concept is as follows.
Player
In Vket Cloud, Player refers to the avatar who operates in the world.
How the Player behaves is defined in VKC Setting Player.
For handling Player by HeliScript, please refer to Player class.
Item
When creating a world on Vket Cloud, each element other than Player is expressed as an Item.
Items include objects with VKC Item Field, VKC Item Object, VKC Item Plane, and VKC Item Activity.
For handling Item by HeliScript, please refer to Item class.
Node
If an Item defined by VKC Item Field has a child object, that child object will be treated as the Item's Node.
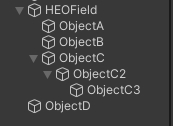
As an example, ObjectA, ObjectB, ObjectC, ObjectC2, and ObjectC3 attached to VKC Item Field on the image below become Nodes, which can be handled by actions such as Show/HideNode, Enable/DisableCollider.
Please note that ObjectD below is not a child object of VKC Item Field (i.e. not a Node)nor an Item, it will not be included in the world on build.
Also, please be aware that Nodes are not in a hierarchy structure.
For example, if multiple GameObjects are to be hided using Show/HideNode, the child-object on the Unity hierarchy will not be hidden when the parent-object is hided by the action / HeliScript. This is because Nodes do not consider the Unity hierarchy.
Therefore, each GameObject / Node must be explicitly called to be a target for the Hide action / script.
For handling Node by HeliScript, please refer to Item class.